Showing posts with label Die Cutting. Show all posts

Friday, June 2, 2017

One Little Craft Tag Challenge #153, Tag Tuesday and Your Next Stamp Challenge


Paint a mixed media tag with orange acrylic paint and let dry.  Tear out a strip of green decorative paper and adhere to the tag.  Stamp the bird and flower images (Recollections) with Archival Ink Jet Black on a circle piece of cardstock.  Color with inktense pencils and activate with water.  Let dry.  Adhere die cut circle of decorative paper and then adhere the bird circle to the tag.

This tag was the fourth tag in the One Little Tag Challenge theme of Orange.

This tag was created for the Your Next Stamp Challenge for the lay out.

It was also entered into Tuesday Tag Challenge theme Animals.  

ICAD #2


Color a color book page with three colors of marker.  Spray with pearlized water and let dry.  Cut out wings and word from black cardstock and adhere to the ICAD>

Daisy yellow oraganizes this challenge and here is the information.  

Monday, April 24, 2017

One Little Craft Tag Challenge #114


On a watercolor tag, create a background using the Stencil Printing Technique with dylusions sprays and a Dina Wakley Stencil.  Let dry.  Adhere the cherry blossom and bird die cut to the tag.  Embellish with paint pens.  Emphasis the shadow of the bird with a water soluble graphite and activate with water.  

Tuesday, March 14, 2017

One Little Craft Tag Challenge #73


On watercolor paper create a background with Ken Oliver Color Bursts using the watercolor technique.  Let dry.  Punch cherries out of vintage dictionary page and color with distress markers.  Adhere to the tag.  Adhere washi tape.

Happy Pi (3.14) day!!!!!

Wednesday, February 22, 2017

One Little Craft Tag Challenge #53


On a tag made from watercolor paper create a backhground using the Masking Tape Pattern Technique.  See below.  Let dry.  Cut flowers out of black cardstock with die cuts.  Adhere to tag.  Apply washi tape. 


Ingredients
Masking or Washi Tape (Washi Tape)
Watercolor Paper (Tag from watercolor paper) 
Watercolor Paint (Crayola)
Watercolor Brush
Clean water
Water to clean brush
Burnishing Tool (Old Gift Card)


Steps
1.  On a watercolor paper substrate apply strips of tape.  Burnish tape down to secure adhesion.
2.  With a clean paint brush, add clean water between tape stripes to create puddles.
3.  Add watercolor to each puddle.  Allow paint to blend.  Tipping the substrate assists with blending.
4.  Let dry naturally
5.  Remove tape.
6.  Enjoy.

Tuesday, February 21, 2017

One Little Craft Tag Challenge, #52


On a watercolor paper tag, create waves of color with Jane Davenport Mermaid Markers.  Blend out with a waterbrush.  Let dry.  Cut bird out of decorative wrapping paper.  Cut branches and leaves out of scrapbook paper.  Adhere the bird, branches and leaves onto tag.  Out line with Stabilo All Pencil and blend.  

Saturday, January 28, 2017

One Little Craft Tag Challenge #28


On a manila tag, stamp girl image (Viva Las Vegas Stamps) several times with Archival Ink Jet Black.  Paint swatches of watercolor paint until tag is covered.  Let dry.  Die cut label and layer together.  Stamp sentiment with Archival Ink Jet Black.  Embellishment glitter washi tape.  

Wednesday, January 25, 2017

One Little Craft Tag Challenge #25


On a vintage dictionary page create a background with Distress Paint and Acrylic Paint Smooshing Technique.  Let dry and then adhere to a chipboard tag.  Stamp the sentiment with letter stamps and Archival Ink Jet Black.  On watercolor paper, create colorful paper with Ken Oliver Color Bursts and let dry.  Die cut stars for the color bursts paper and adhere to the tag.  Emphasis with Stabilo All Pencil. 

Monday, January 9, 2017

One Little Craft Tag Challenge #9


Adhere a facial tissue to a chipboard tag, with wrinkles and let dry.  Dry brush gesso over the tag to create a white wash effect.  Let dry.  Adhere die cuts to the tag.  

Below is a picture of the tag before the white wash step.


Sunday, January 8, 2017

One Little Craft Tag Challenge #8


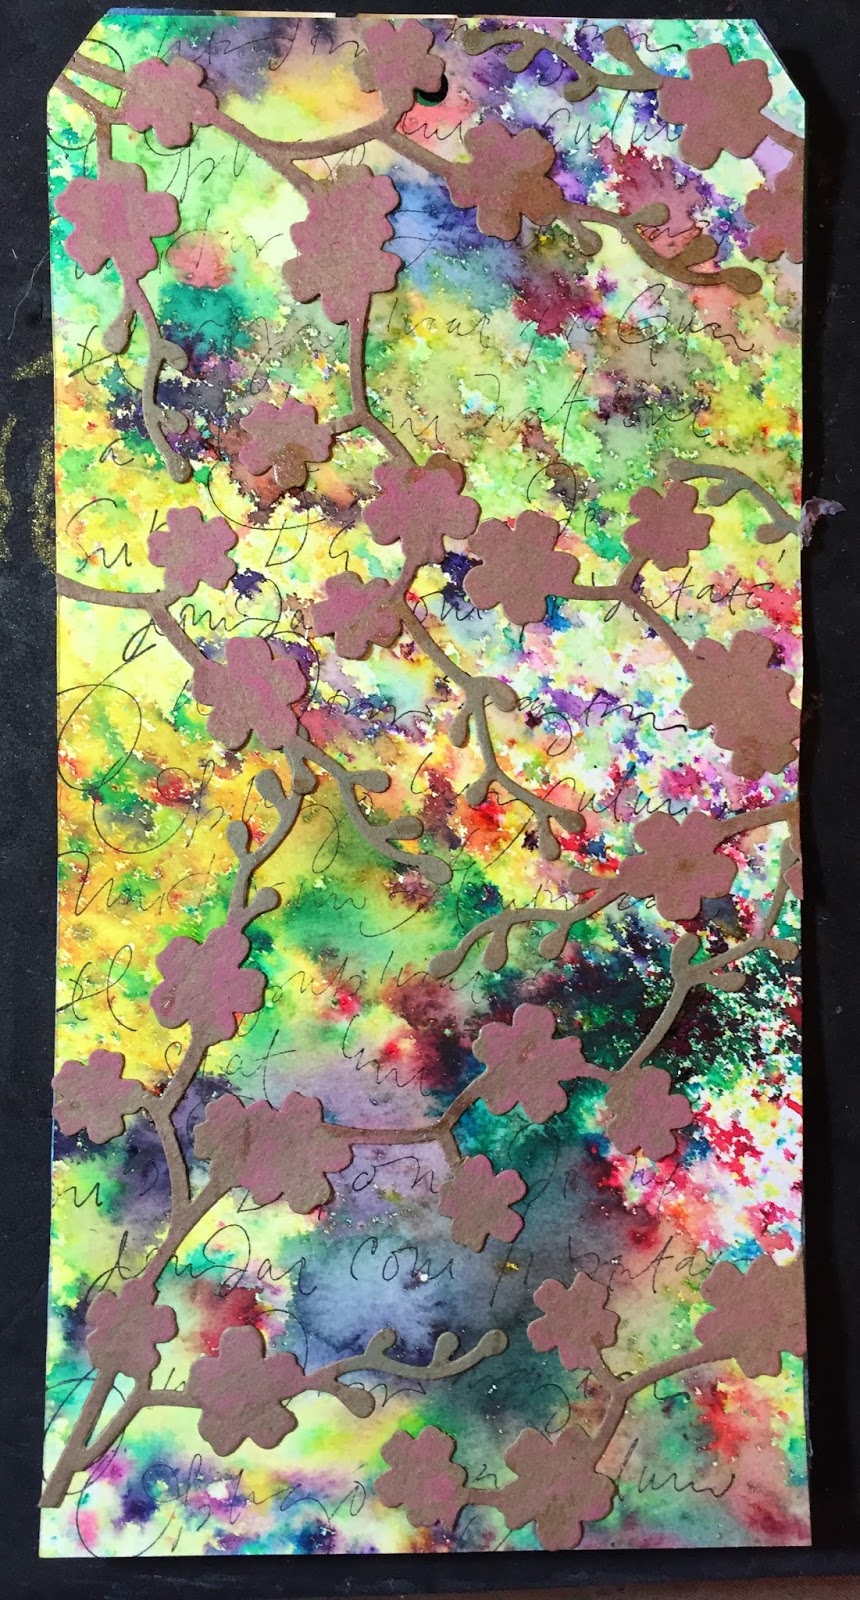
On a watercolor tag, create a background with Ken Oliver Color Bursts and the Watercolor Pigment Dry/Wet Technique. Let dry.  Stamp the script (A Stamp in the Hand) with Archival Ink Jet Black.  Die cut the cherry blossoms from kraft paper and then enhance with pastel pencils.  Adhere to the tag.

Ken Oliver calls this background technique the sprinkle and spritz technique.

Friday, July 15, 2016

One Little Tag Craft Challenge #197


Paint a shipping tag with black acrylic paint and let dry.  Splatter white acrylic paint on tag.  Let dry.  Die cut flowers(Spellbinders) from color book pages and adhere to tag.  Adhere color dot stickers.  

Monday, June 27, 2016

One Little Tag Craft Challenge #179


Adhere a color book page to a shipping tag.  Die cut out flowers(spellbinders) from black cardstock.  Adhere to tag.  

Wednesday, April 23, 2014

Administrative Assistants" Day or what ever the actual name of the day is

One in a series of five cards. 

Ingredients
White Card Base
Distress Markers in Dusty Concord, Spun Sugar and Tumbled Glass
Cardstock in Blue, Pink, and Purple
Canson Mixed Media Paper (MM Paper)
Stamps- Tim Holtz Telephone Blueprint,Tim Holtz Scratches and lLetter Stamps (brand Unknown) 
Archival Black Ink Pad
Copic Lavender Glitter Pen (I believe these are called Spica)
Scissors
Quilting Ruler
Xacto Knife or Paper Trimmer
ATG runner or Adhesive of Choice
Pop Dots
Brayer
Non-stick Craft Mat
Distress Stain in Dusty Concord, Spun Sugar and Tumbled Glass
Pink Polka Dotted Washi Tape
Sizzix Tim Holtz on the Side Die Pennants 
Sizzix Big Shot and Cutting Plates


Steps
1. On craft mat apply Distress Stains side by side. Roll brayer through stain. Apply to MM paper. Repeat until paper is covered in a pleasing way. Let dry. 

2. Using Distress Markers, ink up scratches stamp and apply to card base. Let dry. 

3. Using Archival Ink, stamp telephone stamp on color cardstock. Let dry. Then cut out phone part. Color dial with copic glitter pen. Apply pop dots to back.

4.   Using Archival Ink, stamp phone stamp on distress Brayered paper. Cut image to desired size. Cut colored cardstock to desired size. 

5. Using adhesive mount distress brayed piece to color cardstock. Using pop dots layer cut out telephone to distress Brayered piece as shown.  Adhere combined piece to card blank. 

6. Using Pennants die and big shot, die cut big pennant out of colored card stock. With archival ink, stamp the word thanks. Apply adhesive on back and apply to card base. 

7.  Using Pennants die and big shot, die cut small pennant out of distress Brayered paper.  Adhere over the top of the other pennant piece. Cover edge with washi tape. 

8.Outline all of the pieces with copic glitter pen. 

I used a similar technique for my Easter card. 

Distress Brayered technique is a quick easy background that is very subtle. I believe you could use re inkers if you did not have distress stains